


TAP Article: Science Fair Ideas Using Plastic
 With schools back in session, that means science class. And science class often means a science project or a science fair. It can be difficult at first to think of ideas—as a student or parent assisting a student.
Plastics, however, are part of our everyday life in almost every way imaginable. Using plastics as a base, there are many wonderful and creative different ways you could approach a science fair project that will certainly be fun and informative!
Bridges
The idea: Are certain bridge designs stronger than others? Why, or why not?
Our bridges are tasked with a lot every day. We build them across some pretty amazing large spaces sometimes experiencing bumper-to-bumper traffic and immense weight. They also need to last, be safe, and be able to withstand weather and earthquakes.
Bridge design is constantly evolving as our understanding of the physical principles of design changes. Engineers often need to understand exactly what a bridge can do as well as what it cannot if they are to design a bridge that will serve the needs of a community as well as the climate it is built-in, while keeping people safe at the same time.
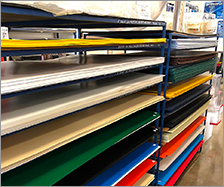
In this idea, several models of various types of bridges can be built using various materials from wooden popsicle sticks or cast acrylic shapes combined with clear acrylic tubes, clear acrylic square tubing, carbon fiber tubes, epoxy, or solid acrylic, fiberglass, carbon square or circle rods.
Add glue, kite string, weights.
Using your materials, glue and string, you could construct at least three different types of bridges. It’s important to use the same materials in each. You could consider a very old style, a more modern style, and a very futuristic style of bridge.
Test and observe the strength of your bridges, writing everything down. Place your different style bridges between two tables for example, adding more and more weight until a bridge collapse. Record how much weight it took to break the bridge and compare it to the other two bridges.
Explain why you think each bridge did well or didn’t.
Plant Structure Capillary Function
The idea: Simulate the capillary function within plant structures. This experiment and procedure would include intervals for examining the results, tracking the journey of moisture over time, and any variations to the experiment that would offer added dimensions.
Materials you can use for this would be:
- One bunch of celery
- Food coloring
- 8 plastic containers of the exact same size and shape
- Kitchen knife
- Vegetable peeler
- Logbook for note-taking
 Fill the plastic containers about an inch from the rim, then add red food coloring to four of the containers and make sure to place the exact same amount in each. Add blue food coloring to four of the containers, using the same number of drops in each one.
Slice six stalks of celery from the bunch and make sure that the cut is as straight across as possible. Also remember to slice the tops off the six celery stalks, while leaving a seventh celery stalk with its leaves intact.
Place three of the stalks in the plastic containers with red water, three of the remaining cut stalks in blue. Now, place the last red container beside the blue water container. Take your seventh stalk with leaves intact and slice it vertically and carefully till the cut reaches just below the leafy regions.
Place one side of the slice in the last remaining red-colored water, and the other in the blue.
After two hours, gently lift the stalks from the plastic containers and observe the bottoms versus tops—don’t touch or move the one stalk that has the leaves still on it. Make detailed notes in a logbook about each change and measure the progress of anything that changes.
After writing down observations, remove one single stalk for closer observation, making a very small thin slice from the bottom. Examine the cross-section and peel gently with vegetable peeler. Examine the bottom and write all observation and changes down.
Repeat this every 4 hours, 8, 12, and 48. That’s five intervals and six stalks.
Once 48 hours has passed, observe the seventh stalk split down the middle with leafy greens at the end carefully and write all observations down. What color are the leaves? Cut and peel away, then note the color inside the celery. Play around with the temperature, how much light, how much shadow, whether they were placed in a dry area or moist area as well.
As plants draw water from roots through hollow capillaries that act like straws, water travels from roots to the plant's system. This process is called osmosis and relies on the narrowing of capillaries as they extend up a plants steam.
The Greenhouse Effect
The Greenhouse effect is the trapping of heat in the atmosphere. Without gases in the air, heat from the sun would bounce back into space. Too much gas in the air causes too much heat to be absorbed into the atmosphere, therefore disrupting the earth’s balanced state. So how do gases and pollution affect the earth’s atmospheric pressure?
Materials:
- At least 1 transparent plastic cubes with lid (or more if you wish to test out how the thickness of plastic affects temperature)
- Tape
- 2 thermometers (or more, to place in any additional boxes if you are making two.)
- Watch, clock, or timer.
Place your lid on the plastic cube and then ensure that all gaps are sealed with tape or glued if you wish. Create a chart to compare the cube for when it is outside and when you bring it inside. There should be two sets of data for inside and outside, with specifications of the temperature at each minute interval. Place the first cube outside in direct sunlight. Before you begin, use your spare thermometer to note the starting temperature starting at 0 minutes. At 1, 2, 3, 4 and 5 minutes, make a quick note of the temperature of your cube in the sun outside.
Before bringing your cube inside, measure the outside temperature of wherever you will place it. Bring your cube inside quickly and mark the temperature of it once inside at the 1, 2, 3, 4, and 5-minute mark.
Compare the differences in temperature and findings. How did they differ? Did the speed increase or decrease? Which was hotter in the sun? Which was colder in the shade? What effects would this have on the air and on the cube and how does that translate to earth?
Some other ideas that you can incorporate might be:
- How does the thickness of a material such as acrylic, fiberglass, carbon, and polycarbonate affect its tensile strength?
- How does temperature affect the properties of plastic?
- How effective is Polystyrene in removing calcium from water?
- How to identify different polymers and what makes them so different?
- Metal versus plastic: which one works better?
- Which types of plastics are food safe and why?
- How can plastics help seed or plants survive harsh winter conditions?