Mold Making Guide - Two Part Skin Molding
Two Part Skin Molding
Parts of The Mold
1- Positioning lines
2- Marker keys
This procedure is the same as the one part skin molding but is done twice, whilst observing several precautions; choosing a parting line to be as invisible as possible and positioning markers must be set up for both membranes and both backing cases.
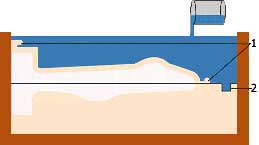
Position the model up to the chosen parting line in a plastiline base. Apply a calibrated plastiline sheet to the exposed part of the model. Make the first half of the backing case.
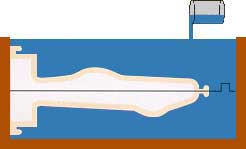
Once the first half of the backing case has hardened, remove the plastiline making up the base and turn the first half over. Make the second part exactly as the first one but apply a mold release agent on the exposed surface of the backing case.
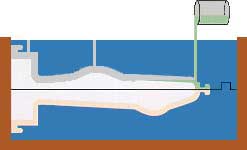
Making the Membrane
Once the second half of the backing case is hardened, one of the two sheets of plastiline covering the model is removed (preferably the one with the largest surface area). Drill through pouring holes and vents. Apply release treatment of to the internal side of the half casing. RTV of the first side is poured.
Exact same procedure is followed for the second half.
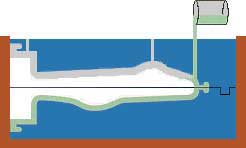
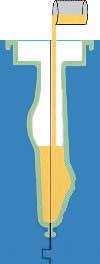
Demolding is carried out once curing is complete. Cut of the flash from the pouring an venting holes. Equipment is cleaned using a solvents such as alcohol or acetone.
Reproduction is made using the material of choice.
Reproduction is made using the material of choice.
Two Part Block Molding
One Part Skin Molding
Two Part Skin Molding
One Side Impression Molding (Brush Molding)
Two Part Impression Molding (Brush Molding)
