How to build a Plastic Heat Bender
How to Build and Use a DIY Plastic Line Bender
Bending plastic sheets at home is made easy with a DIY line bender. This guide will take you through the steps to build your own line bender, ensuring safety and efficiency. Additionally, if you prefer a professional-grade solution, we’ll introduce you to pre-made options available from TAP Plastics.
Safety First
Since this project involves electricity and heat, proper precautions must be taken to avoid fire or electrical shock:
-
Work in a dry area.
-
Never leave the line bender unattended while plugged in.
-
Have a fire extinguisher nearby.
Materials Needed
-
36-inch heating element
-
Power cord with a three-prong grounded plug
-
1/4-inch deep, 3/4-inch wide channel
-
Two pieces of 1/4-inch thick plywood (2.5 inches wide)
-
Baseboard
-
Screws or glue
-
Aluminum foil
-
Fireproof material (fiberglass tape)
-
Stapler
-
Grounding wire
-
Grounded extension cord
-
Electrical tape or rubber band
Building the Line Bender
-
Create the Channel: Cut two plywood strips, each about 2.5 inches wide. Attach them to the baseboard using glue or screws, ensuring they are 3/4 inch apart.
-
Line the Channel:
-
Place several layers of aluminum foil over the channel.
-
Add two layers of fiberglass tape as a fireproof barrier and staple it in place.
-
-
Install the Heating Element:
-
Position the heating element in the channel.
-
Secure the power cords at both ends using screws to keep the element flat.
-
Electrical Setup and Safety
-
Assemble the Power Cord:
-
Slide the plug pieces together as per the instructions.
-
Do NOT plug it in yet.
-
-
Grounding the Foil:
-
Attach a grounding wire to the aluminum foil using a small screw.
-
Connect the other end of the wire to the ground prong on a three-prong extension cord.
-
Secure the wire with tape or a rubber band to prevent it from slipping out.
-
-
Powering the Heater:
-
Plug the heating element into the grounded extension cord.
-
Then, plug the extension cord into the wall outlet.
-
Always follow this order to minimize the risk of electrical shock.
-
-
Supervise During Use:
-
The heating element can reach up to 900°F.
-
Keep flammable materials away and monitor closely while in operation.
-
Alternative: Professional-Grade Line Benders
If you prefer a ready-to-use solution, TAP Plastics offers two professional heat benders:
-
24-inch model
-
48-inch model
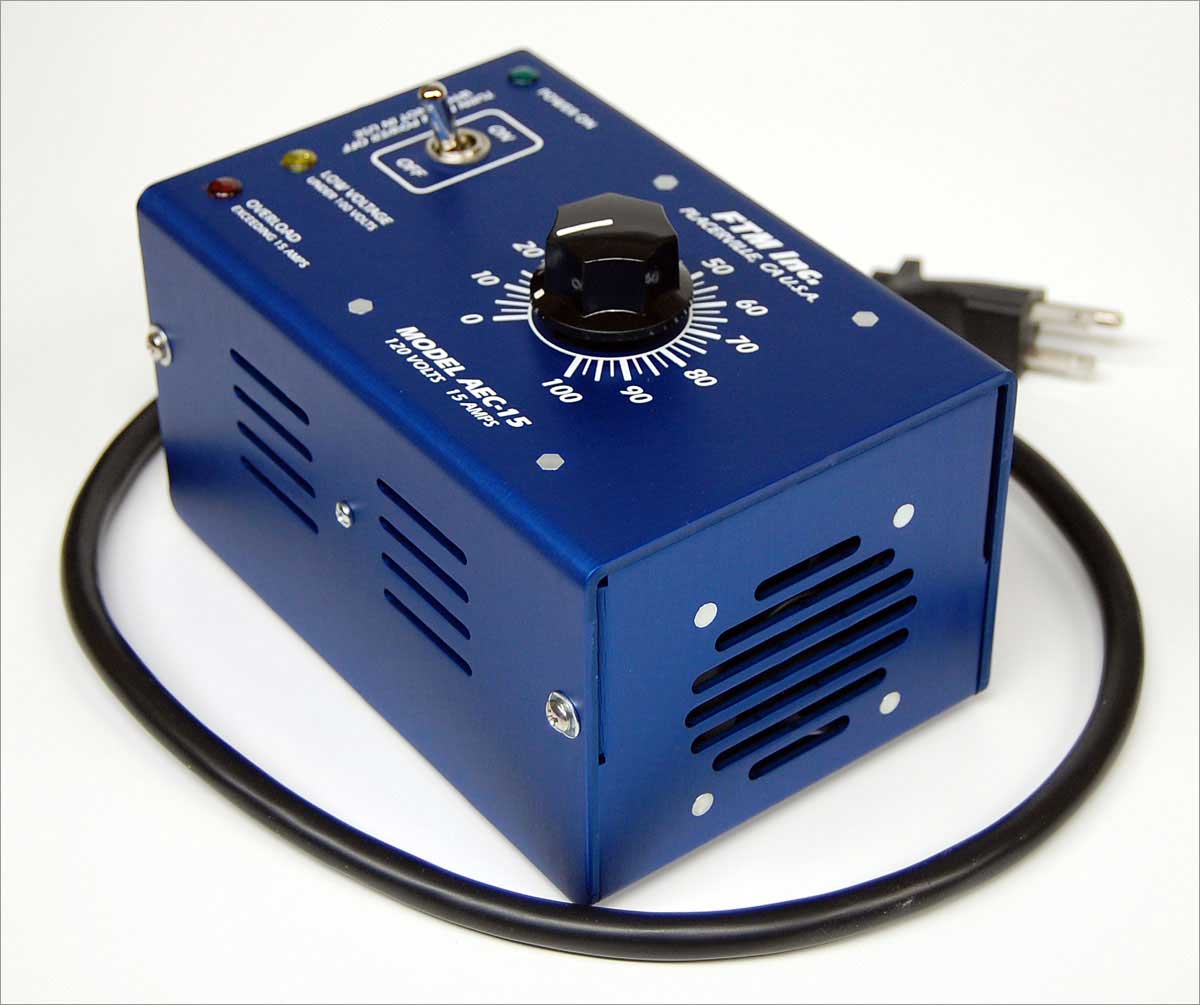
Both models are pre-assembled and plug directly into a power source. To control the heat output, a power controller is available, which is especially useful when working with very thin or thick materials.
Conclusion
By following these steps, you can build a reliable plastic line bender for home use. Whether you choose to DIY or invest in a professional model, you’ll be able to achieve clean, precise bends in plastic sheets for various projects. Happy bending!